Showing posts with label samples. Show all posts

Monday, 10 February 2014

Lampshade Tutorial Part 1

This is part 1 of 2 Lampshade Upcycle Tutorial. I would of made it one big post, however, both are entirely different and deserve the recognition alone.

This tutorial is for covering a large shade for a floor lamp or ceiling shade that you simply no longer like.

I'm making over a plain cream shade that I bought as a tall floor lamp from Dunelm Mill several years ago, the stand is beautiful but the shade had seen better days and well I couldn't find a replacement so I decided to make it over.

What you'll need:

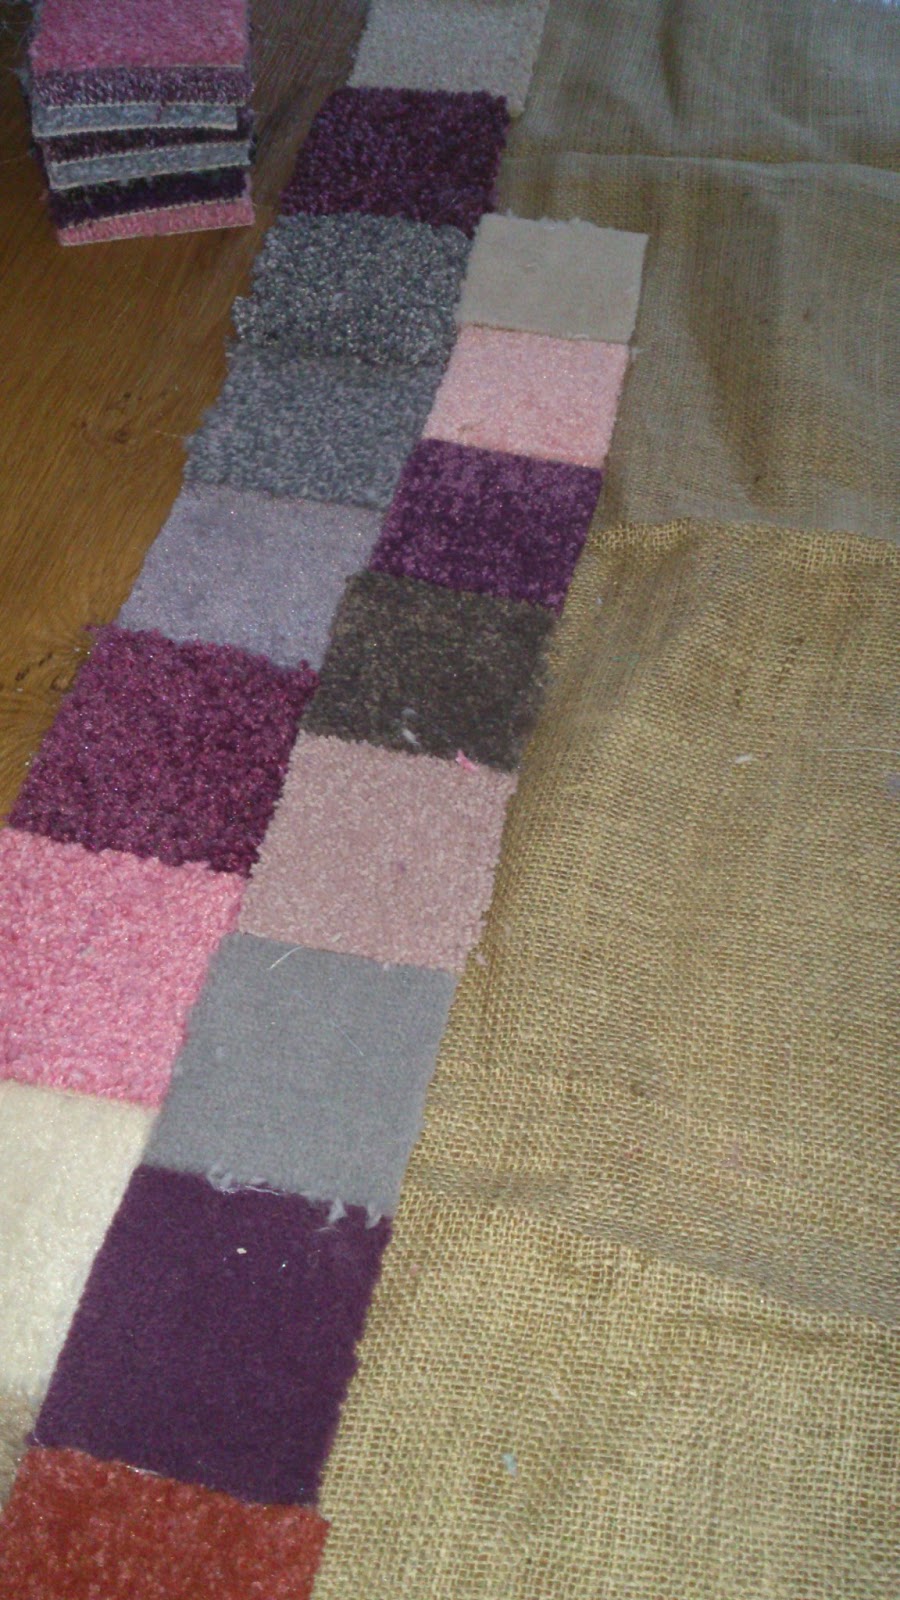
Fabric. Enough to cover the shade you want to re-cover. I used fabric samples from John Lewis that I had collected over the years. I wanted a cosy yet masculine feel so I chose similar fabrics but mixed up the patterns for texture and well I love the patchwork look! Just make sure you have more than enough fabric to cover the shade, always better to big than not big enough!


 An old shade. Luckily my shade was plain but in all honesty it doesn't really matter either way, well until you switch it on, see Part 2 for an explanation!


Glue.  I used carpet tile spray glue, this stuff is great from being able to peel it back if you get a crease or need to start over. It dries pretty quick and is inexpensive for the quantity. I got a can from B & M for £3.99.

I was having a moment when I decided to take on this make over, I wanted time to relax whilst I was still being productive so I decided to hand stitch the panels together instead of using the sewing machine. A machine would take a few mins to sew all the panels together large enough to cover the shade, hand sewing meant it took me a whole day just to get it large enough. I thoroughly enjoyed this, and you don't have to worry to much if your hand sewing isn't tip top, once its glued on you will never know.
I then ironed the panels to get them nice and smooth ready to adhere to the shade.


Now this can be the tricky part, I ended up covered in spray glue! Lay your fabric wrong side up and lay the shade on top starting at the seam.

Now spray the glue and smooth out, keep going in small sections making sure its all covered in glue and is nice and smooth, now make your way around the shade.

When you get back to the seam, fold over the fabric to give a nice clean edge and glue down well.

Trim the excess fabric and glue around the top and bottom, and voila... your shade is complete!


I adhered mine at an angle and you will too as with the shape it doesn't allow for a straight finish, see part 2 for more info!

Allow to dry and add back to the stand.


Stand back and admire your work, you made that, feel proud!!

Thursday, 30 May 2013

Handmade Rug - A Tutorial

Ive been after a patchwork rug for a while and to get one large enough for my lounge it would easily cost £100+ and to be honest i really didn't want to spend that so i went about seeing if i could make my own with carpet samples.

Tools:

Hot Glue gun
Scissors

Materials:

Carpet samples (amount depends on size of rug you are making) (these can be ordered from John Lewis and all leading carpet sellers)
Hessian or similar.

I cut the hessian to the size i wanted, this was just a trial run to see how it looked, if my idea worked and if anything needed taking into account when making it.


I took as many swatches as i need to fit the width of hessian in all the same size, as you'll find they all come in different depths and sizes and began hot gluing them to the hessian.


I did the next row in a different size swatch, for me this didn't really work and when i make my full size one i want to make sure that the samples are all the same type of carpet and all the same size so you don't feel the difference in the carpet when you step on it.


I continued with this until i had filled the hessian. I managed to pull it slightly out of shape when i was gluing so its slightly wonky on my finished piece.
I also glued each piece to each other as well as the hessian or it moves under foot, this keeps each piece in place.


Its found its home in front of the cooker, stops my toes getting cold when I'm cooking. It looks great but going forward i know what needs to be changed, also id place them an inch inside to allow for a binding round the edge on the rug as they are now, after using for a week and being hoovered, have began to frey around the raw edges.

Hope you give this a go too even if its just for an entrance mat, hessian is just a few pounds a meter and the carpet samples are completely free just don't be as impatient as i was for giving it a go because it takes a lot more than you expect to make one a decent room size. * Goes back to hoarding carpet samples*


L xx